Configuration of TP-Link WR841N
Can be used similarly for the following devices:
- TP-Link WR841N
1st Step
Connect the device to the power plug and turn it on. Some control lights should alight now.
2nd Step
Connect a computer or mobile device to the router. Name (SSID) and password of the network should be printed onto the device.

3rd Step
Open a browser and type the address into its address line which you can find on the back of the router under „Default Access“, e.g. http://tplinklogin.net. Now a login interface should open.
In case this does not work try the following numbers in the address line::
4th Step
Username is „admin“ and password is „admin“ as well.
5th Step
Click on „Quick Setup“ left in the window at the second position.

6th Step
Choose „Wireless Router“ and click next.
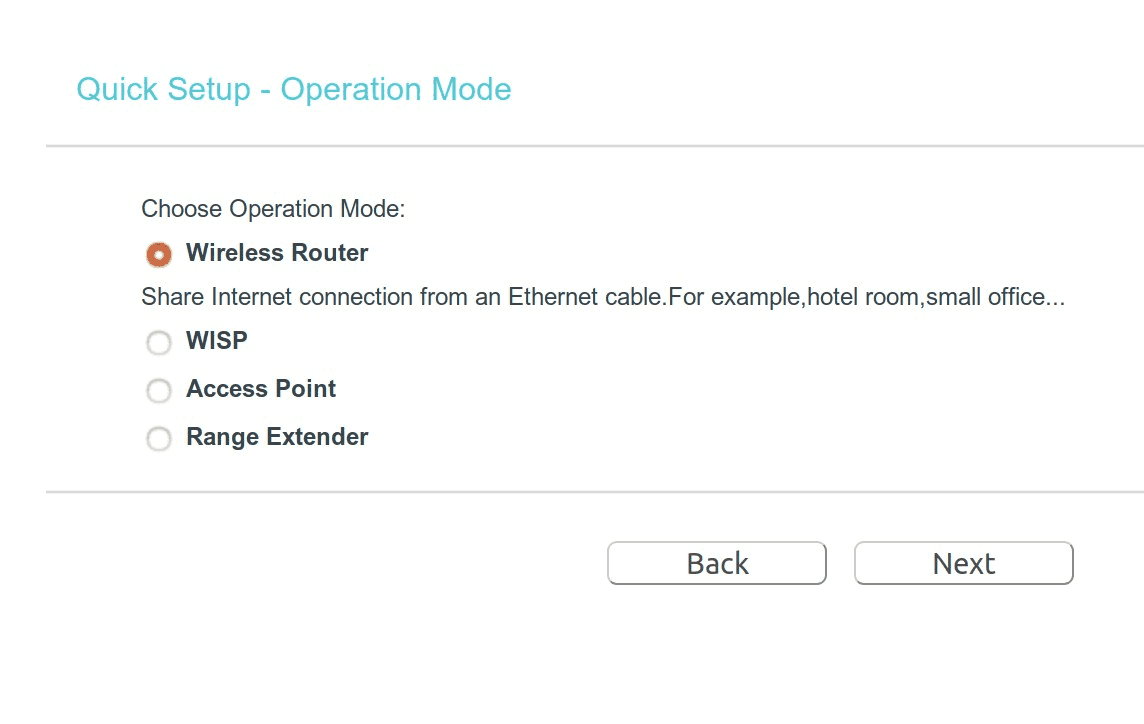
7th Step
Choose „Dynamic IP“ and click next.
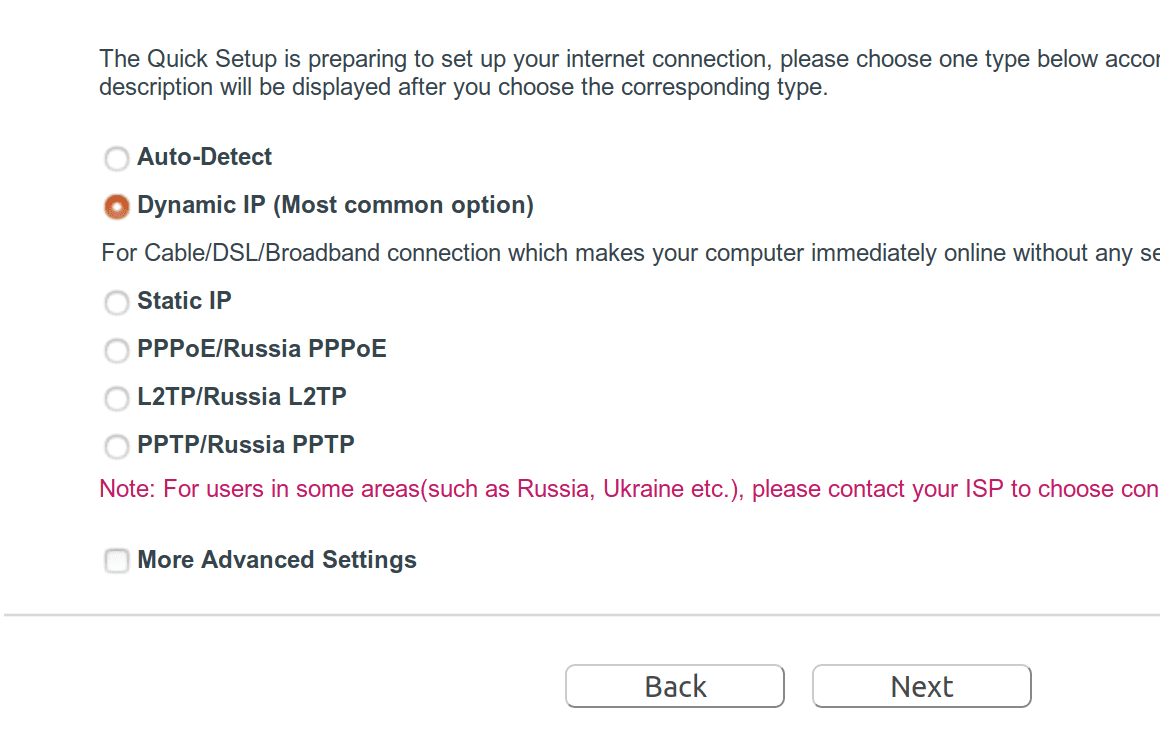
8th Step
Choose „No, I do NOT need to clone MAC address.“ and click next.

9th Step
Choose a creative name and a secure password for your WiFi. Information about secure passwords can be found here: NIST Special Publication 800-63B
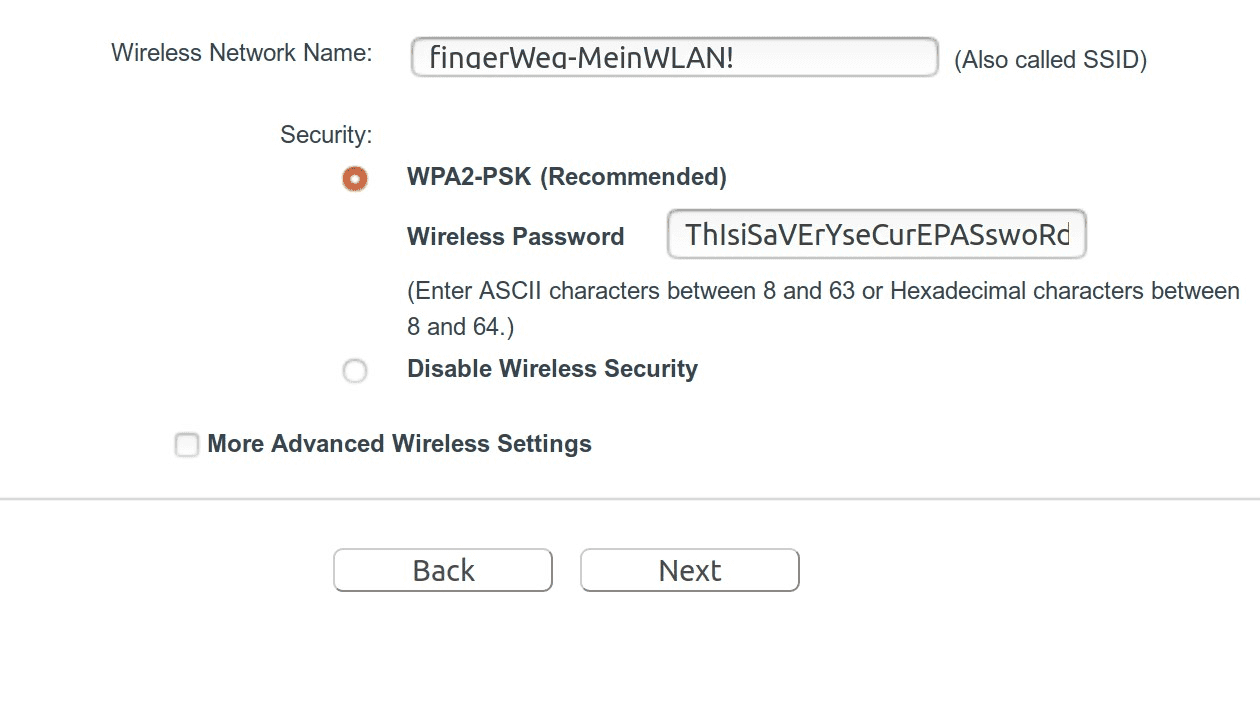
10th Step
Click in „Save“.
11th Step
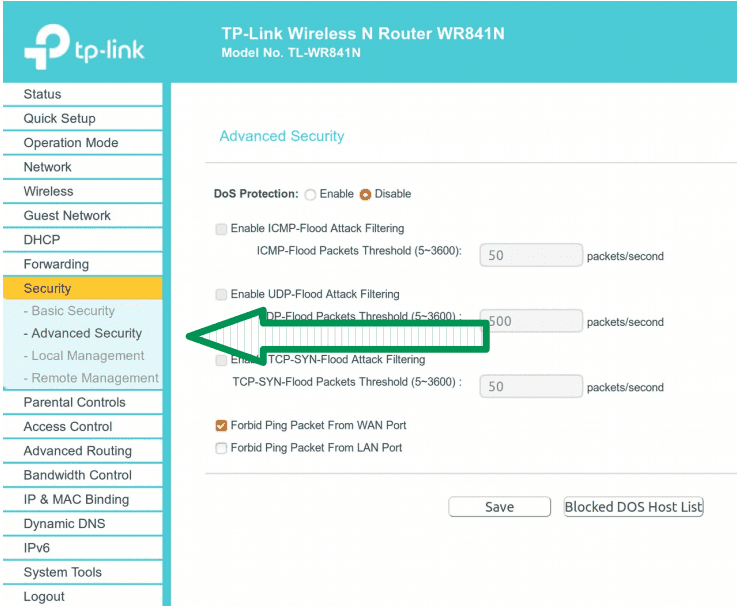
In the left column, go to „Security“ then „Advanced Security“.
12th Step
Uncheck the box „Forbid Ping Packet From WAN Port“ and save. Should this be named „Allow Ping Packet From WAN Port“ or something like that, check the box.
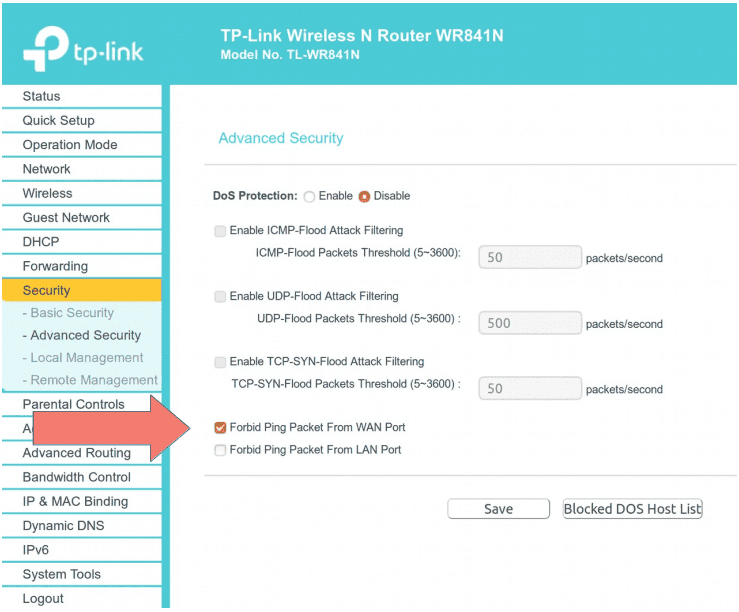
The university sends ping requests to all logged in devices every two minutes. Devices that do not answer are logged out. Unchecking the box allows the router to answer to our requests:It is then essentially telling the university „Hi, I‘m still here.“
13th Step
Reduce transmission power under „Wireless / Advanced“.
You don‘t need that much power for a small room. The reduction of the WiFi power will reduce errors for the WiFi signals of your neighbors.
14th Step
Connect the WAN port (blue socket) to the left socket at the wall. Now please wait a moment.

Only in case the left socket does not work, try the right one.
15th Step
In the left column, go to Status and scroll down to WAN. If you can find here an IP address thats starts with 134.93.…, then you are successfully registered.
If you encounter any problems during the setup, please write an email to
nag-wallstrasse@uni-mainz.de